How to Manage Deleted Files & Recover Data in Nextcloud
Accidentally deleted a file in Nextcloud? No worries!
Nextcloud includes a Deleted Files section that lets you restore files or permanently delete them. Here’s how you can manage your deleted files effectively.
Step 1: Delete a File
-
Locate the file you want to delete.
-
Click the three-dot menu next to it.
-
Select Delete to move it to the trash bin.

Step 2: Access the Deleted Files Section
-
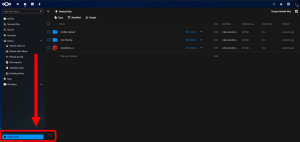
Click Deleted Files from the left sidebar to open the trash bin.
-
Here, you’ll see a list of recently deleted files.

Step 3: Restore a Deleted File
-
In the Deleted Files section, find the file you want to restore.
-
Click Restore to return it to its original location.
Step 4: Permanently Delete a File
-
In the Deleted Files section, locate the file you want to remove permanently.
-
Click the three dot beside the Restore to Delete Permanently to erase it forever.
Step 5: Understanding Nextcloud’s File Retention Policy
-
Deleted files do not count toward your storage quota.
-
Nextcloud automatically deletes older files if storage space is low.
-
By default, deleted files stay in the trash for 30 days unless the admin modifies this setting in
config.php.
Nextcloud’s file recovery system helps protect your data by allowing easy restoration while also providing options for permanent deletion. Stay in control of your storage with these simple steps!
Need More Help?
You can also watch this video for a step-by-step guide: [Video Tutorial] 🎥

